Notice! This post is more than a year old. It may be outdated.
Dropwizard is a framework for building RESTful web services in Java. Similar to Spring Boot, Dropwizard applications are packaged into an executable fat JAR file. In addition to executing a Dropwizard application from the command line, you can increase your productivity by configuring your IDE to do that for you. I’m going to be looking at how to run a Dropwizard application in IntelliJ IDEA, Eclipse and NetBeans.
To execute a Dropwizard application, its main method needs to be called with the correct arguments. When you execute a JAR file from the command line, the JVM reads the entry point to your application from the MANIFEST.MF file. It contains key-value pairs and the key we’re interested in is Main-Class. In a Dropwizard application, this is set to your Applicaiton class.
Equipped with this knowledge, it should be relatively easy to instruct your IDE to run a Dropwizard application during development. I’m going to be looking at how to do that in the three most popular Java IDEs based on Zeroturnaround’s Java Tools and Technologies Landscape Report 2016
IntelliJ IDEA
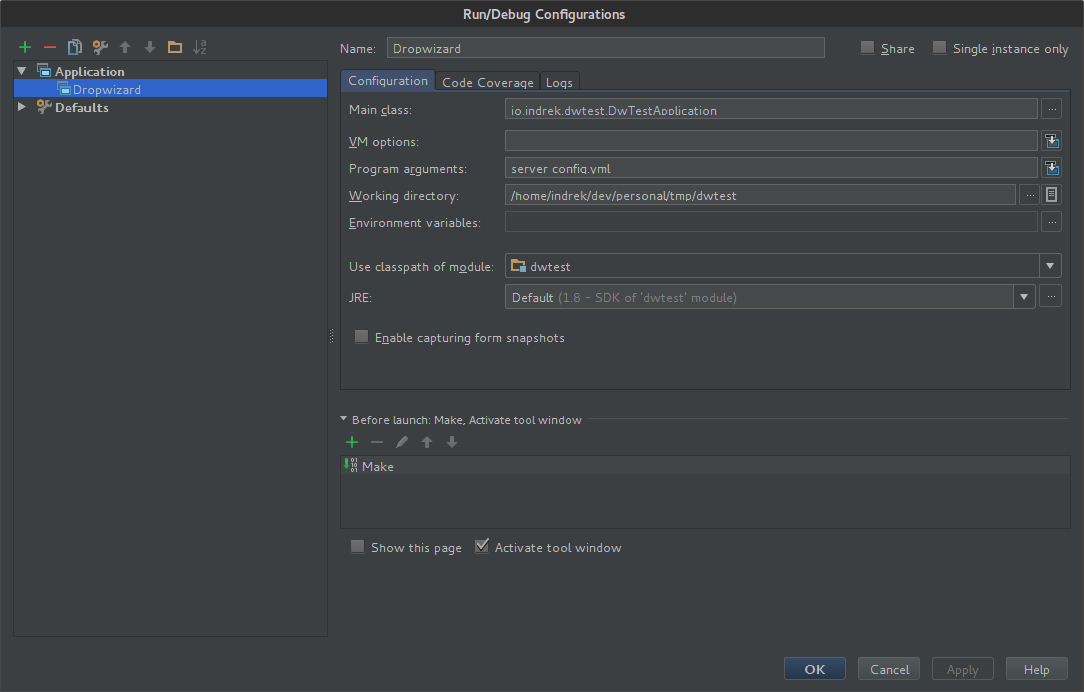
- Open Run/Debug Configuration menu by selecting Run -> Edit Configurations… from the menu.
- Add a new configuration by pressing Alt+Insert or clicking the green plus sign in the top left corner.
- From the dropdown menu, select Application.
- Add a name to the configuration.
- Enter the fully qualified name of your main class.
- Enter
server config.ymlto the Program arguments field. These are the same arguments you would pass to your application if you were running it from the command line (view image below). - Press Shift+F10 or select Run -> Run <your run configuration name> from the menu to start your Dropwizard application

Eclipse
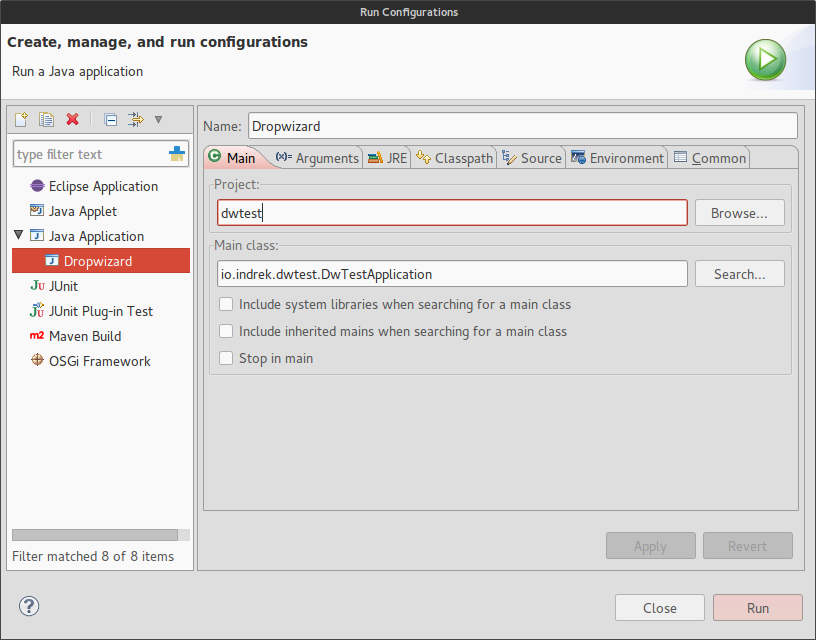
- Open your project’s Run Configurations menu by selecting Run -> Run Configurations.
- Create a new Java Application launch configuration.
- On the main tab choose a name for the configuration and specify the main class.
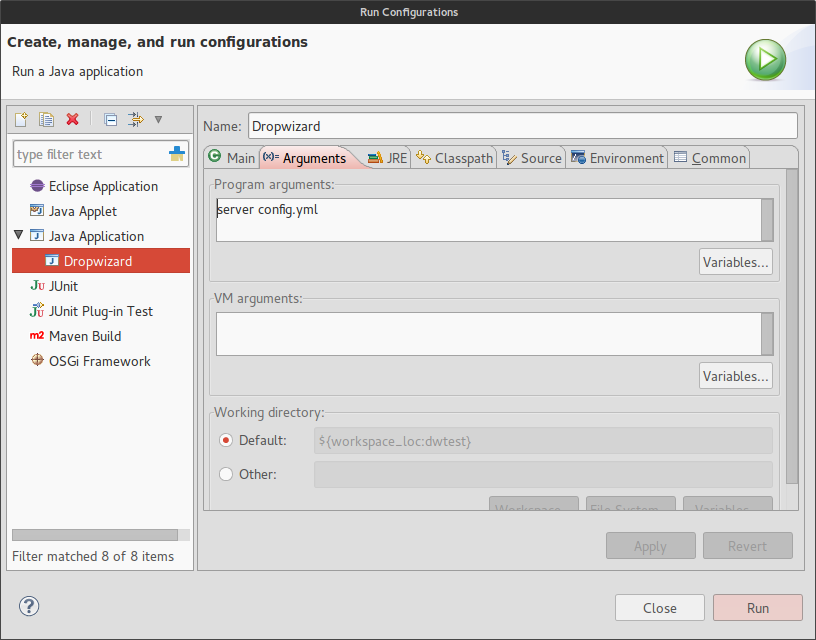
- On the arguments tab add
server config.ymlto the program arguments text field. - Click the run button or press Ctrl+F11 to run your Dropwizard application.


NetBeans IDE
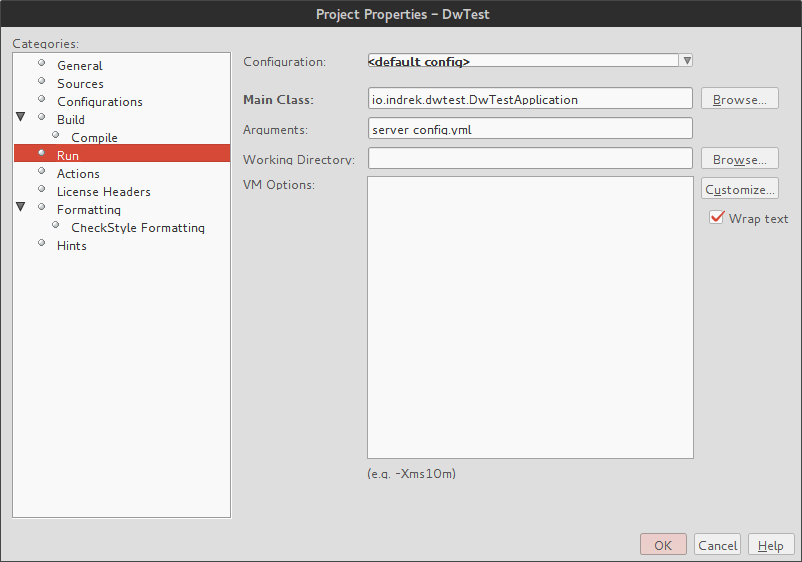
- Open project properties by right-clicking on the project folder in the file explorer and select properties.
- Select the Run category from the left.
- Enter the fully qualified name of your main class.
- Enter
server config.ymlto the Arguments field and click OK. - Now you should be able to run your Dropwizard application by pressing F6 or by selecting Run -> Run Project from the menu.

Final words
If the IDE you use is not listed here, you can still apply the same principles. The key is to instruct the IDE to call the main method with the desired arguments. Following the same steps it is very easy to attach a debugger as well. Instead of selecting the run option, you need to start the applicaiton in debug mode. For instance, in IntelliJ, instead of pressing Shift+F10 to run the application, press Shift+F9. In Eclipse and NetBeans the key combinations are F11 and Ctrl+F5 respectively.

